《 Ukulele - CP1 - Body 》
◆ Bending the Sides |
||
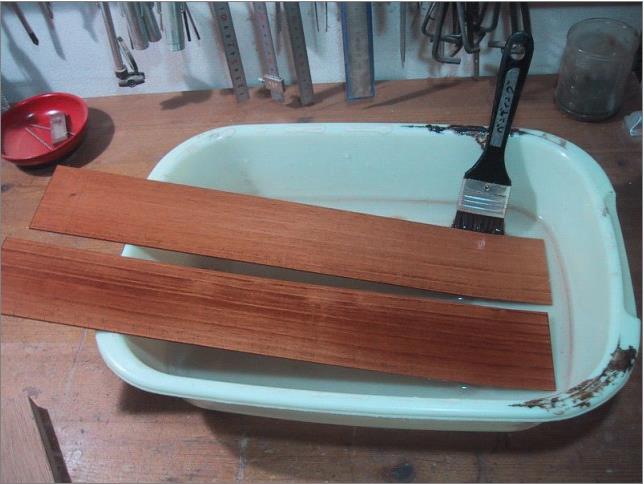 |
Mahogany is one of the best materials for ukulele in view of the easiness of making and the cost benefit. The sides to be used is 65mm wide, 400mm long, and to be thicknessed to 1.8mm if possible. Sides materials should be soaked enough in water prior to bending. |
|
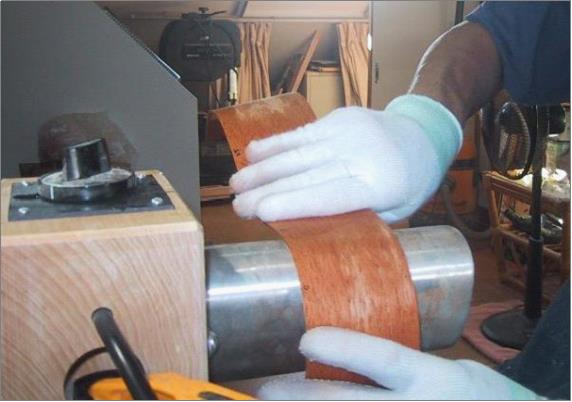 |
First, heat both sides of wet part not only bending spot but also neighboring area of that spot. Always try to distribute hand pressure evenly to avoid the risk of cracking. Keep wood wet during bending. Do the same thing several times until you get the shape you want. Any slight adjustment in shape can be rectified when fixing onto the mold. |
|
 |
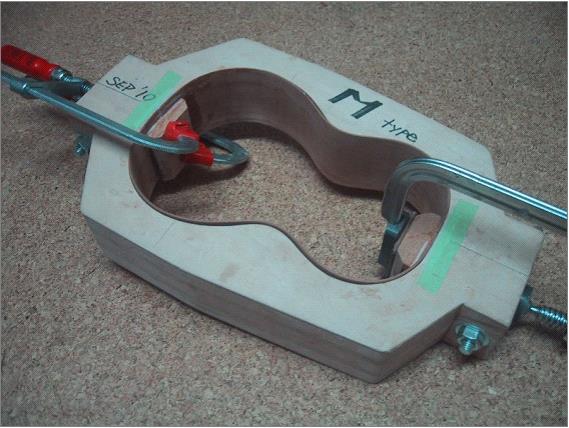
Set the sides into the mold in alignment with the centerline of body, and tighten it with cramps. |
|
◆ Blocks |
||
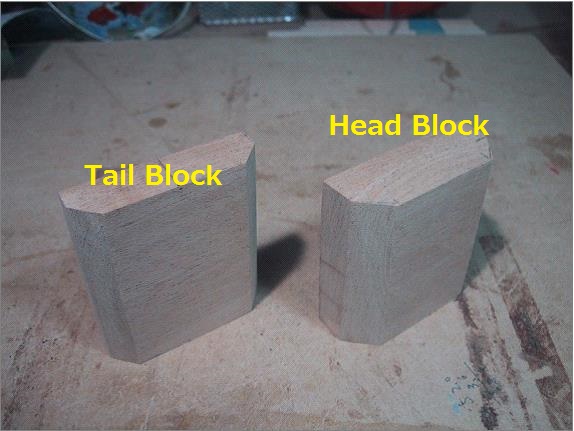 |
There are two blocks to joint the end of the sides. These two pieces of blocks must firmly be fixed in line with the centerline of the body. |
|
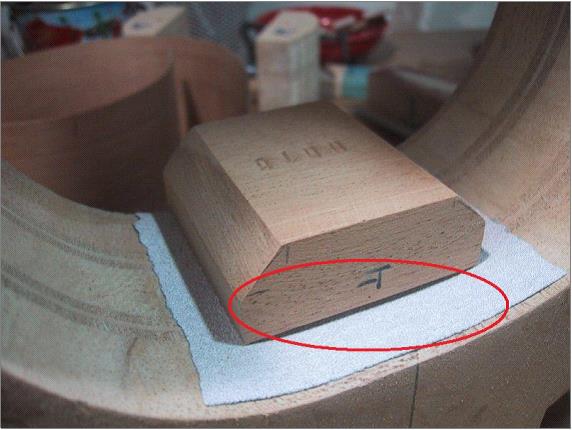 |
Side of head block supposed to be fixed to the sides, should be sanded down resulting in exactly the same surface of the mold. |
|
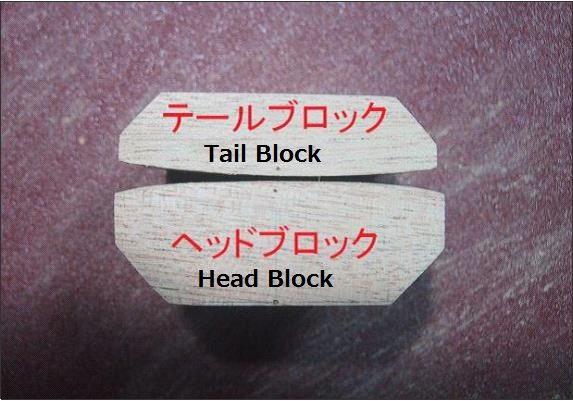 |
Top vew of two blocks already sanded shows round surface which must be the same as the surface of the mold. | |
 |
Two pieces of sides are to cut symmetricaly, This process must be treated with most care and precision. File the end of the sides and make sure from time to time, if the sides surely fit the mold or not by putting them into the mold. | |
◆ Jointing Blocks |
||
|
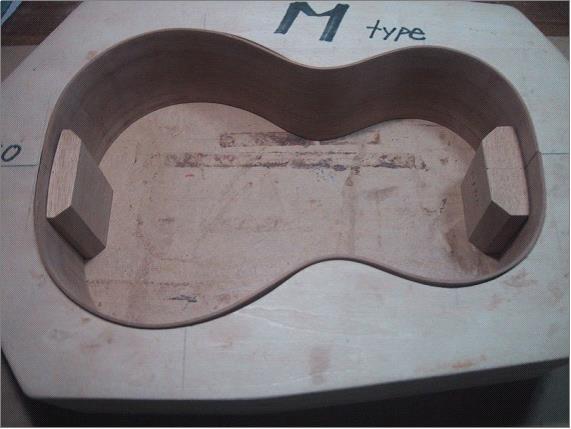
Set the sides into the mold and put both blocks to the sides. Ensure both are well fitted each other. Remember that bottom of the mold on this picyure becomes the upper side of the body which means topboard side. |
|
 |
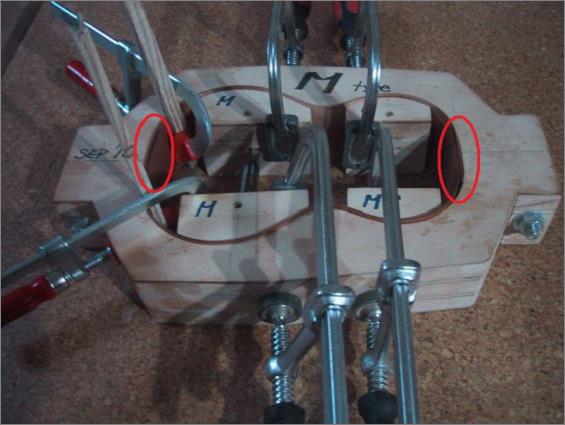
First practice dry clamping without glue. Two clamps should be applied on each block despite the picture which shows one clamp each, and remember to insert the wax paper between the sides and mold to avoid the sides adhering to the mold by overflowed glue. |
|
◆ Topboard and Backboard |
||
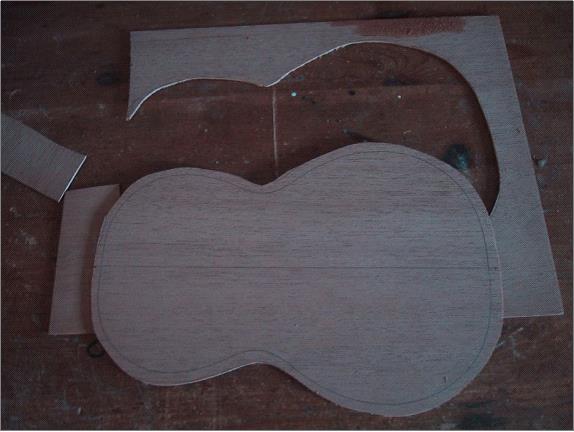 |
Using template of body shape is the easiest way to draw the line. After cutting, sand them targeting 1.8mm of thickness. |
|
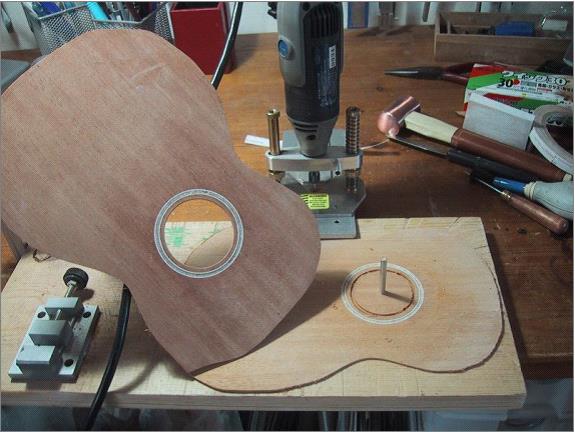 |
As ornament of soundhole on a topboard, pieces of purflings will be inlayed on a border. For cutting groove Dremel router and StewMc's routing guide are used. Details are described on a booklet (not available in Eng). |
|
◆ Braces and Bridge plate |
||
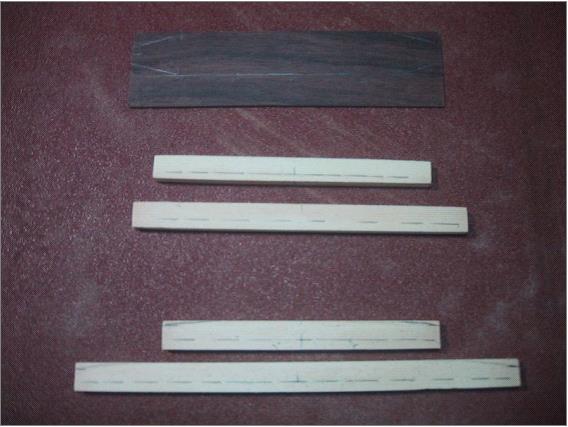 |
Top and backboard should be reinforced with the braces and the bridge plate for keeping topboard flat from getting warped by string tenshion. Thickness of plate is 1.5mm. |
|
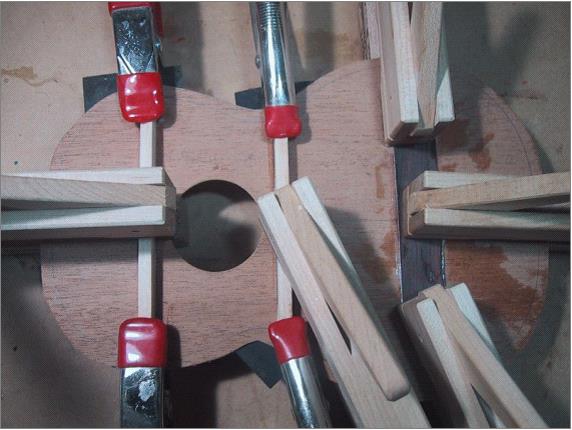 |
After marking the position where the braces are glued, glue then firmly cramp the blaces with topboard. PIC left shows clamping two braces and bridge plate with the topboard. |
|
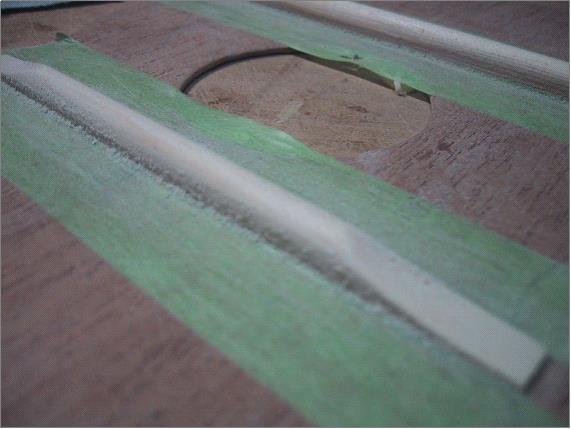 |
After gluing carve the rough shaped braces into finished form with planes and chisels. |
|
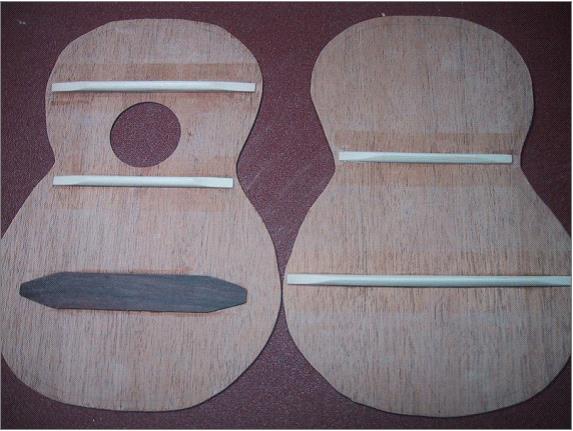 |
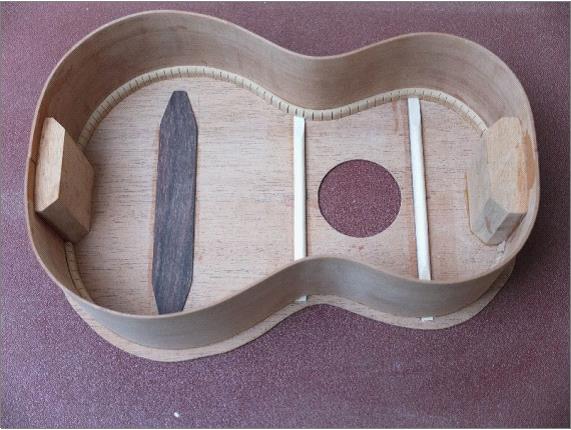
All the braces are firmly attached to the boards in the right places. PIC left shows flat topboard and slightly round shaped backboard. |
|
◆ Kerfed Lining |
||
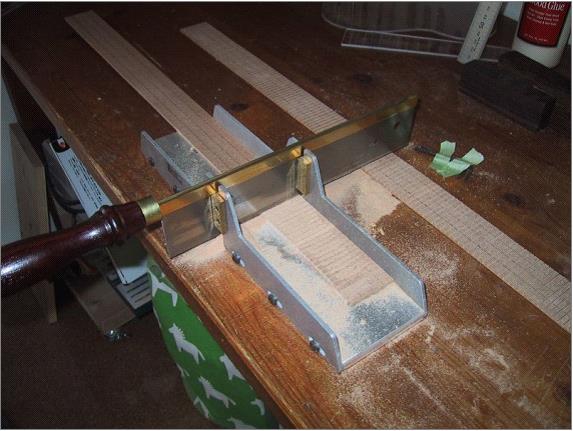 |
For jointing top and backboard, attach the lining to the sides to enlarge an area to be glued. Lining should be kerfed to ease bending. PIC left shows wood material fixed in a miter box for kerfing. This miter box is used for fret slotting. |
|
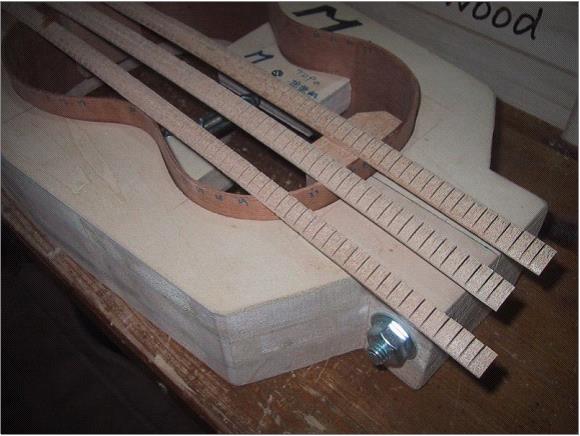 |
Linings have been kerfed at regular intervals of 5mm, and shape of cross section is rectangular. | |
 |
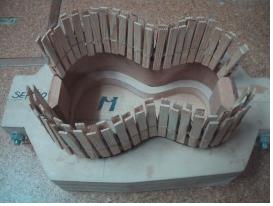
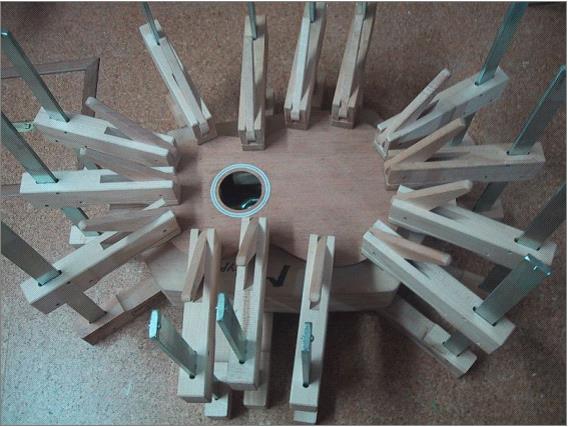
The linings are also wet and heated for bending in the same way as the sides before attaching to the sides. PIC shows two linings, one already clamped and the other showing glue spreaded. |
|
 |
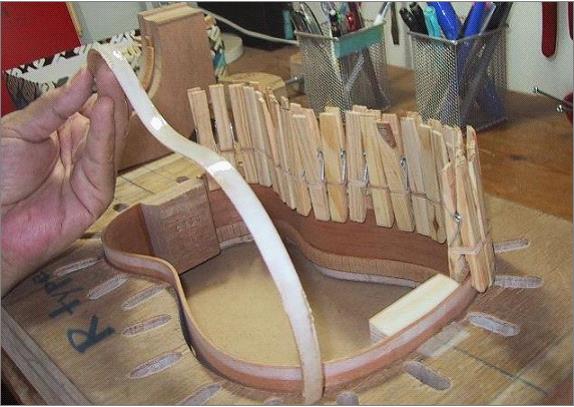
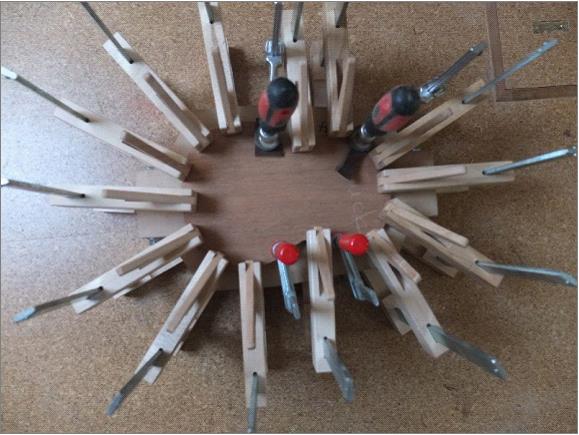
Remember to fix the topside first, then go to the backside later on. PIC shows fixing the lining to the topbside with sufficient clothespegs. |
|
◆ Fitting the topboard |
||
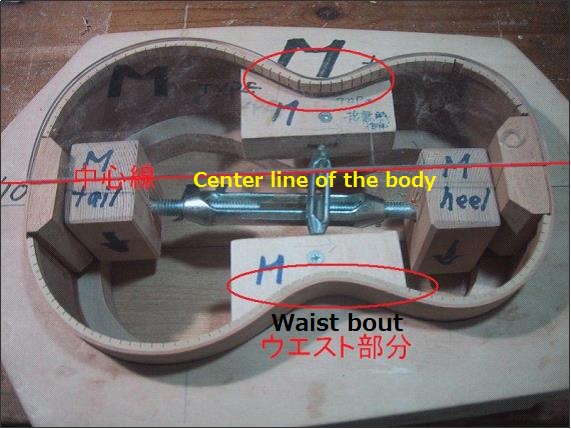 |
Before gluing, firmly fix the two blocks and waist bout of the sides onto the mold. Be sure to align the center of the body with centerline of the mold. |
|
 |
Practice dry clamping and ensure the centerline of the topboard surely matches the centerline of the sides and topboard is completely fitted with the sides. |
|
 |
PIC shows inside view of the topboard just attached together with the side. Excess of topboard should be removed and trimmed well with #120 grit paper |
|
◆ Fitting the Backboard |
||
 |
Height of the side should be adjusted according to the plan. Nneck side is 52mm in height which is the lowest and 60mm at the tailend side which is the highest. |
|
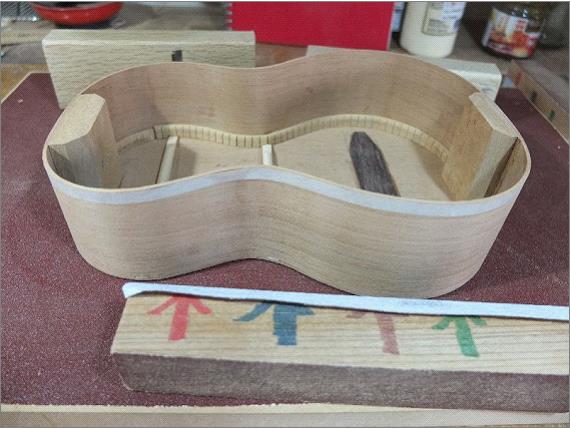 |
Set the body in a mold, and cut the side following the marked guideline with plane and file. PIC shows the sides already cut. |
|
 |
Now get ready for attaching the linings to the back side in the same way as topboard. |
|
 |
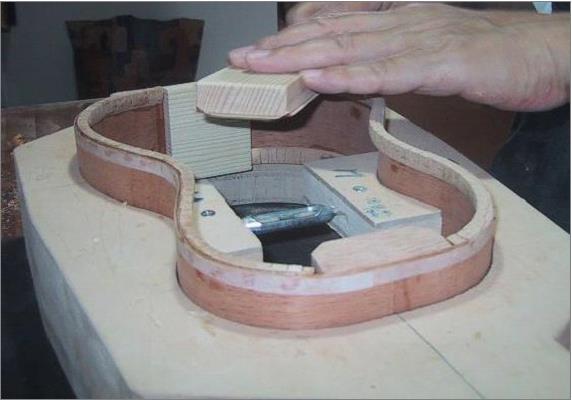
Gluing the backboard in the same way as topboard, but a bit more attention and power will be required in clamping because of its round shape. A way of clamping is the same as topboard. When using F-clamp, contact points must be protected by rubber pad to keep them intact. |
|
◆ Assembled body |
||
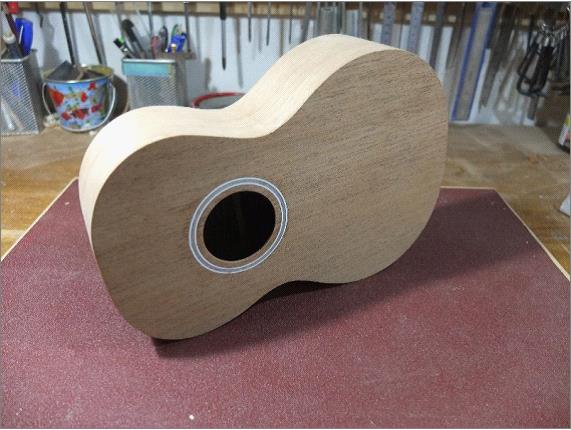 |
After removing the excess of wood materials and overflowed glue, sand all over the body until the marks of scratch disappear. Use #120, 240, 320 grit papers. |
|